Finally.
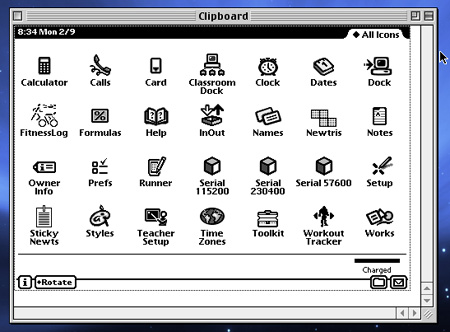
Many months after getting my hands on a Newton eMate 300, and after taking “screenshots” with my Canon PowerShot digital camera, I’ve finally figured out how to take a real-live screenshot using Apple’s Newton Toolkit.
Newton Poetry reader Matej gave me a heads-up with a comment on my fitness app post last week. “Use the Newton Toolkit, not a camera, you dummy!” he said.
Which was fine and good. I’ve been looking for a method to take screenshots, without much luck, since I got my first Newton, a MP110. Most Newton users recommended using an app called ScreenShot and e-mailing the resulting GIF to yourself via Mail V. But since I don’t have e-mail set up on my eMate, it seemed like a clumsy, cumbersome solution. Why couldn’t I simply command+shift+3, like on the Mac?
It turns out it’s almost that simple to take a screenshot on your Newton with Apple’s Newton Toolkit. The problem I faced was finding out how to do the screenshot. Plenty of helpful FAQs and forums pointing to the Toolkit method, but none explicitly laid out step-by-step instructions.
So I’m going to do that for you today, because I had to find my own way – and it shouldn’t be that hard.
The first step is to download Apple’s Newton Toolkit on a OS 9 or older Mac (there are ways to do it on an OS X Mac, but that’s for another time). I grabbed my copy off UNNA. There are several files to download: one called “NTK164.sea.hqx,” and another called “NTKMac164b3.sit.hqx.” Download the second one first, expand the file, and follow the instructions in the “Read Me” file.
Newton Toolkit is primarily a development platform for the Newton. If offers a way to create apps for our pioneering PDA. While the desktop Toolkit offers the development platform, there is also a Toolkit.pkg to intall on your Newt for testing and connection. So, using Newton Connection Utilities or Newton Toolkit (under Project > Install Toolkit App), upload the Toolkit.pkg onto your Newton and run the installation. Now you’ll have a second way, besides the Dock, to connect to your Mac (or Windows – this stuff works there, too).
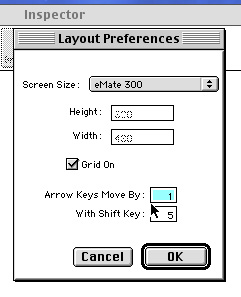
To grab a correctly-sized screenshot off your MessagePad or eMate, first you need to set up Newton Toolkit to recognize the correct type of Newton. Do that in Layout > Layout Prefs. Then, in the pull-down options, select your Newton (above). I use an eMate, which means my screenshots will be landscape. MP2x00 users have other options, depending on their screen orientation.
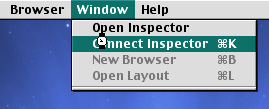
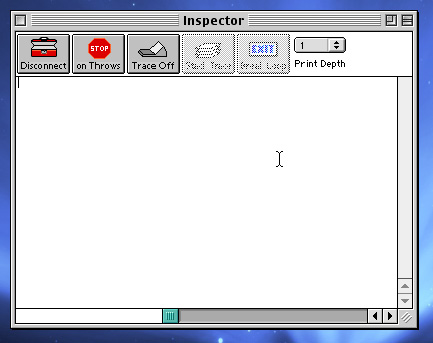
Now we’re going to launch the Inspector mode in Toolkit. To do so, head to Window > Connect Inspector (above). There’s also a button on the Inspector window that says “Connect.” You can use whichever way you like.
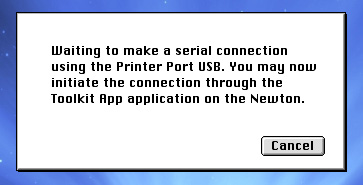
Inspector will wait until you connect your Newton via serial port, AppleTalk, or USB adaptor, as in my case. Once it’s connected, you’ll find yourself at the Inspector home window:
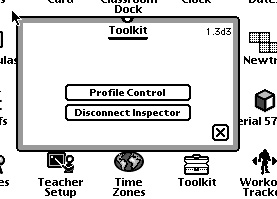
Here’s what it looks like on the eMate side of things:
Now that the Inspector is hooked up to your Newton, taking a screenshot is a piece of cake.
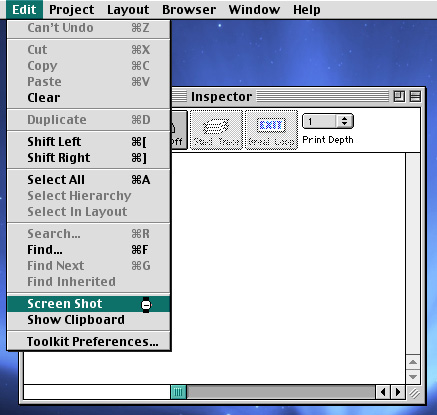
In Toolkit’s Inspector, head to Edit > Screen Shot (above). You’ll hear the familiar snapshot sound that signals a screenshot. Unlike the Mac’s screenshot, however, the picture file isn’t automatically dropped on your harddrive. Instead, it sits in your clipboard.
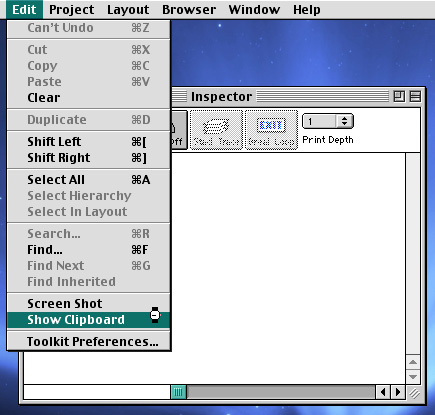
Toolkit’s Inspector lets you view the screenshot in your clipboard with a simple menu selection, also in the Edit menu (above).
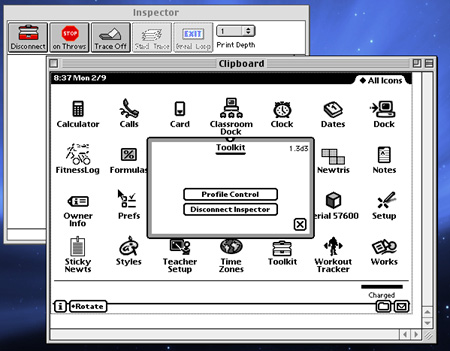
Voila – there it is. To grab this screenshot, I took a (Mac) screenshot of a (Newton) screenshot: while Toolkit displayed the Newton screenshot, I hit command+shift+3 and grabbing the PICT file out of my iMac harddrive.
From there, it’s a an easy cropping job in PhotoShop or Preview to get just what I need. The screenshots look 100% better than the pictures I was taking, and a much-clearer presentation environment for these kinds of Newton Poetry how-to posts.
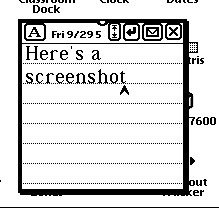
What’s nice about the Inspector is that it runs in the background on your Newton, which means you can take screenshots while messing around with other apps on your Newt (above).
I should mention that one of the modern Newton-to-OS X connection apps, NCX, provides an easy way to grab screenshots off your Newton. It didn’t work with my eMate 300, however, giving me a “not enough memory” error message when I tried. MP2x00 owners have had better luck.
So that’s it. Sometime soon I’ll try the Toolkit screenshot method with an OS X Mac. But if you have access to a classic Mac, and you need to take screenshots, Newton Toolkit is an easy way to do it.
This is terrific as I just bought an eMate so I will give a go :-)
Michael
Japan
Posted by Michael Vallance on February 16th, 2009.
Great, Michael – let us know if you get it working!
Posted by davelawrence8 on February 16th, 2009.
Great instructions.
I just tried it in OS X with NCX but it crashed everytime I tried taking a screenshot in Leopard. Oh well.
Posted by Ryan on March 9th, 2009.
[…] Take screenshots on your Newton Recently, I learned how to take screenshots of my eMate using the Newton Toolkit. There are other, more complicated ways, but this one was the most immediately useful for my needs. […]
Posted by Newton Poetry — How to do stuff with your Newton on March 26th, 2009.
[…] enough, although I would think taking a screen capture would work as […]
Posted by Newton Poetry — New Newton blog shows off monochrome masterpieces on April 20th, 2009.
[…] to try the new screen shot function on NCX – something that was only possible before in a few roundabout ways, like with Newton […]
Posted by Newton Poetry — Newton connects with Snow Leopard on November 5th, 2009.
[…] a calendar, and a few data-tracking apps, and control it with a pen. Or dig into the soup and pry open Toolkit and have your way with the device. The kicker was that this device was too expensive for the […]
Posted by Newton Poetry — The Newton, 10 years later on March 25th, 2010.