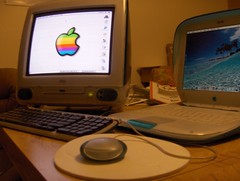
I try to practice what I preach, so when my grandma’s old Packard Bell computer exploded, I bought a used blueberry iMac G3 to fix up and upgrade for her to use.
The iMac bears the scars of its duration in the public school system, but it still chugs along. I bought a 256 MB SO-DIMM RAM chip for it, thinking it would help pull a new Panther install along on the 333 MHz machine, but I think grandma’s model was one of the iMacs that will only recognize some of the RAM it’s given. Given that, it seems 256 MB of RAM would be better used in my iBook G3 333Mhz blueberry clamshell.
But first, I needed to swap that RAM chip (a PC133 model) with a 256 MB chip inside my Bondi Blue iMac G3 (a PC100 model).
Why? Because my Bondi iMac only registered half of the 256 MB RAM installed. I’ve read reports that said some early, tray-loading iMacs will only recognize some of the installed RAM. Would a PC133 chip make a difference?
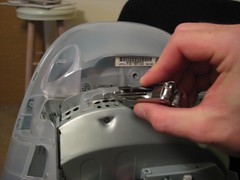
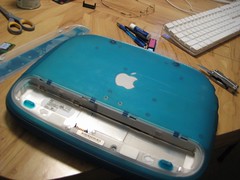
First things first – take the 256 MB PC100 chip out of the Bondi Blue iMac. To do that, I followed Apple’s instructions and started with the screw on the back side of the iMac, under the clear plastic pull-out handle:
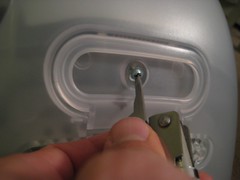
Just one screw holds the bottom shell in place.
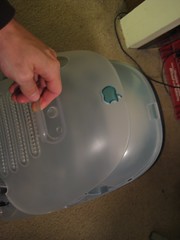
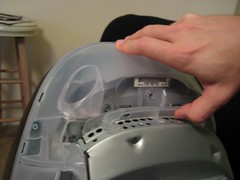
There are plastic tabs holding the shell in place. Simple wiggle the shell away from the bottom of the iMac (above).

Now you’ll find the good stuff (above): the display cable, CD-ROM drive and hard drive connectors, and a random serial cable whose purpose is unclear.
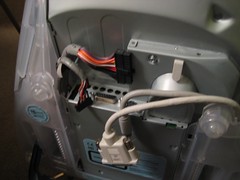
I start with the display cable (the widest one, with the screws), and yank out the others.
Before you get inside, however, there are two more screws holding the motherboard unit in place, and they’re right under the clear plastic handle-looking thing, above all the connectors you just pulled out (above). Unscrew those.
From here, I brace my fingers against the iMac and pull up on this clear plastic handle-type thing with my thumb. The whole thing – from the CD-ROM tray to where your fingers are – should all slide out.
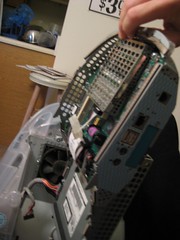
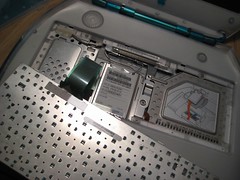
And here’s your motherboard. In front is the CD-ROM drive, behind that is the hard drive, and on top is where you want to be. The inside is not near as pretty as the outside, eh?
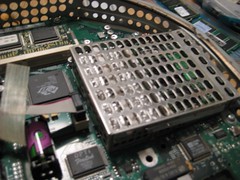
This is the RAM shield, protecting the RAM slot.
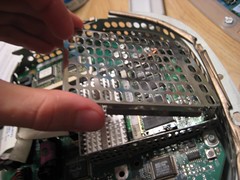
To get to the RAM, start by lifting up on the front of the shield (above) and the rest should pop out easily.
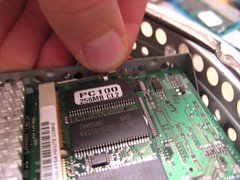
Your RAM chip is snuggled in between two metal prongs. Carefully place your finger or thumb on the metal holders and pull them away from the RAM chip.
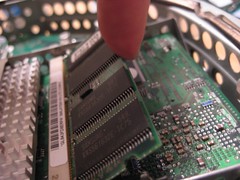
The RAM card should pop up automatically. Lift up and it should slide right out.
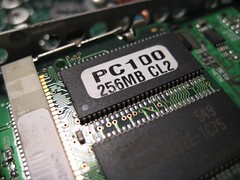
Above is our RAM chip: 256 MB of PC100 RAM. And I’m sure, back in the day, it was worth a pretty penny. Now? About $10, with shipping. You can see it’s a 256 MB chip, but the iMac only recognizes half of that. So we’ll install this chip in the iBook, and put the PC133 RAM chip I just bought into the iMac.
To put the iMac back together, just do the reverse of the above, carefully sliding the motherboard unit back into the iMac body. Be sure to reconnect all the cables, too. You may find the clear plastic shell, the one on the outside with all the tabs, is a bit tricky to slide into place. But as long as that one screw, under the pull-up handle, is in place, your iMac won’t fall apart.
Now the iBook. I’ve already explained how to get into the iBook in my “How to install an AirPort card” post. But, just as a reminder, be sure to pop out the battery on the underside:
With that you can pop out the keyboard by unlocking the tabs in the top of the F-keys:
From here, it’s all about taking out the AirPort card. To do that, simply follow the reverse directions of the AirPort installation instructions. You can also follow Apple’s own instructions on how to i
nstall RAM.
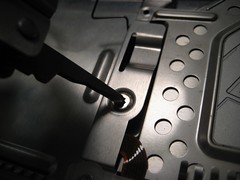
With the AirPort card removed, only the RAM shield stands in your way. My iBook had been tinkered with before, so there’s only one screw holding the RAM shield in place (above). Unscrew it!
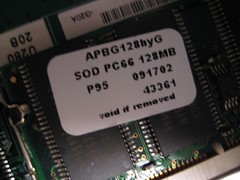
And there’s the exposed RAM. Turns out it’s a PC66 chip, which means this would work fine in my iMac, too. Much like the iMac, you pull the metal tabs away from the RAM chip to loosen the chip. It should pop up automatically.

Lift up and pull the RAM chip out.
Pop the 256 MB chip into place, replace the RAM shield and AirPort card, and close the iBook back up.
Now we’ll see if either Mac recognizes the chip.
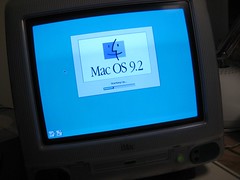
The iMac starts up just fine. But look what it shows me when I click “About this Mac”:
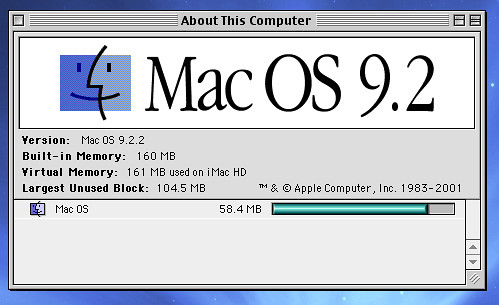
Here we have it: it’s only showing 160 MB worth of RAM even though I have 288 MB installed.
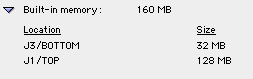
The System Profiler shows me the two slots, above, and the 256 MB chip is only registering at half the memory. Weird. It’s like ordering a Big Mac and getting a bun with no meat.
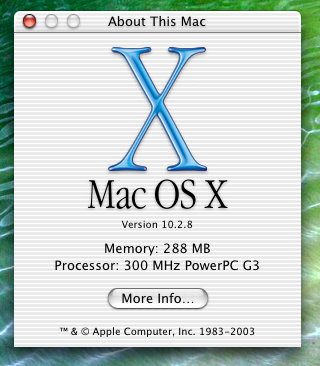
The iBook, however, recognizes the 256 MB PC100 RAM chip I installed (above). I’ve read that the clamshells can take either PC100 or PC133 RAM. It’s only the iMacs (the blueberry and my Bondi) I have problems with.
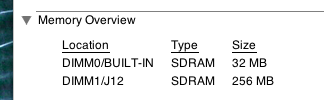
Here’s what System Profiler shows – as opposed to what the iMac registered.
On the iBook, running Jaguar, I would often notice how the system would slow down with iPhoto or Photoshop. Now, hopefully, those slowdowns would ease.
There you have it – a Mac RAM swap of sorts, with one chipset successfully recognized (the iBook) and one set at only half power (the iMac).