Posts tagged “project”.

Installing a 2 GB hard drive into a Newton

April 21st, 2010

Courtesy of Riccardo Mori

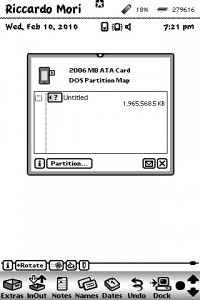
Riccardo Mori over at System Folder (which gets better with every post) tried a fun experiment: installing a 2 GB PCMCIA Toshiba hard drive in his MP2100:

I don’t think I’ll ever need 2 gigabytes with my Newtons — my biggest flash card is 32 MB, and it’s more than enough for my needs — nevertheless I wanted to try a little experiment to see to what extent such PCMCIA hard drive is actually usable.

A few ATA drivers and a fresh set of batteries, and what do you know – it worked. Mori is experiencing some battery drain and slower read/write speeds.

“The only way to make good use of this PCMCIA hard drive, I guess, is by putting a rechargeable battery pack and leaving the Newton connected to the AC adapter,” Mori says.

HowTo: clean a keyboard in the dishwasher

January 19th, 2010

Keyboard vs. Dishwasher - prep

A few weeks ago, my clumsy self spilled a cup of coffee on my Apple Pro Keyboard.

I loved the keyboard, a late 1990s model that shipped with Power Mac G4s and later iMac G3s, and used it everyday with my new iMac. It was too important to me to simply let go.

So I washed it in the dishwasher.

More… »

How to: Install a new Newton eMate battery pack

April 13th, 2009

Newton eMate 300 - materials

The Newton eMate 300 is a great machine. Small, portable, rugged – a sort of proto-netbook that lets you type on the go. And the battery life is great if you have a working, rechargeable battery with plenty of juice.

When my eMate came, I found out right away that the battery pack was probably the original. It held a charge for about three minutes. So while it’s handy to pop a few fresh AA batteries into a MessagePad and be back up and running, the eMate relies on its single battery pack. If it goes, you’re stuck with replacing it, building a new one from scratch, or keeping your eMate plugged in at all times.

I opted for the simplest solution: buy a new battery pack on eBay and installing it myself.

To start, I grabbed a new eMate battery pack from PowerBook Guy, a Torx wrench (I actually took my eMate into the hardware store to get the perfect-sized wrench), my eMate, and some starting instructions from Frank.
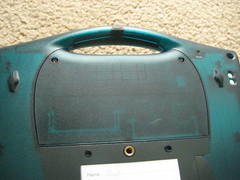
Newton eMate 300 - take this off

The first step is to flip your eMate over. See that half-circle hatch near the handle (above)? That’s what you’re taking off.
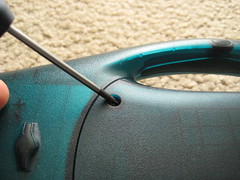
Newton eMate 300 - unscrew

There are just two screws to remove on the cover, and they’re both at the top.
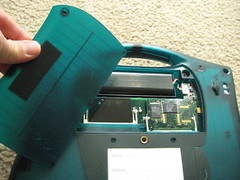
Newton eMate 300 - take off the cover

I left the screws in their slots as I lifted the cover off so I wouldn’t lose them. Now you see the good stuff: a few memory slots and the battery.
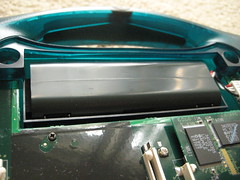
Newton eMate 300 - battery resting spot

The battery pack isn’t bolted to the eMate; it simply rests in a little trench, with a wire attached to the circuit board.
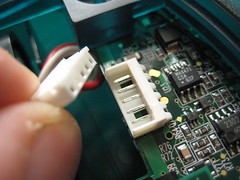
Newton eMate 300 - disconnect

This is the most delicate of the steps: pulling the battery connection cable away from the circuit board. Be careful, and use something (I used my fingernail) to wedge the connector away from the plug-in.
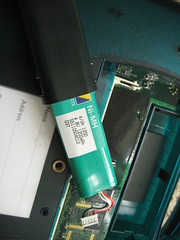
Newton eMate 300 - put in the battery pack

From here, pull the battery pack out of the eMate. The actually battery pack fits snugly inside the holster, but slides right out.
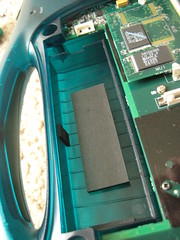
Newton eMate 300 - battery pack tray

Here’s what the empty battery tray looks like inside the eMate. The soft pads keep the battery pack case from sliding around inside the Newton.
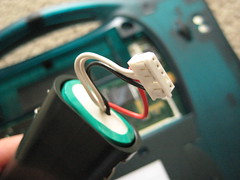
Newton eMate 300 - battery pack inside casing

Slide your new battery back inside the protective casing, with the connection wire sticking out of the right-hand side.
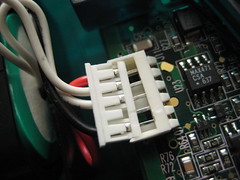
Newton eMate 300 - plug in

Now carefully slide the connection wire into the circuit board until it snaps tight. A little push on the white part will be plenty.

Place the battery case inside the eMate, replace the cover, and tighten your screws. That’s all.

I plugged my eMate in and let it charge a whole day, and now it’s like I have a whole new eMate. A fully-charged battery pack should last you for days, even with heavy usage.

The battery pack cost me about $20 (plus shipping) on eBay. There are some DIY die-hards who are all about making their own battery pack, but the soldering made me nervous. Maybe someday I’ll give it a try. This solution, however, worked fine for me.

Now my eMate is truly portable because I don’t have to worry about keeping it plugged in at all times. Replacing the battery pack was a cinch, too, and took all of about five minutes.
Project PowerMac: how to install a DVD-ROM (the right way)

November 24th, 2008

Boy, do I feel like a goober. A commenter on my “DVD-ROM doom and gloom” post, Seele, pointed me to a how-to article on switching the optical drive in a blue and white Power Macintosh G3. Here I had been having issues getting the drive tray out from the inside of my PowerMac G4; it turns out I was going about it all wrong.

My objective was to switch out the CD-ROM drive in the PowerMac with a DVD-ROM drive I picked up on eBay. Looking back at the original post, you can see where it all went wrong:

Early on, though, I found several obstacles – including ill-placed screws holding the CD-ROM drive (one placed behind the drive, facing the other side of the PowerMac, which is impossible to get to) and power supply in place. The power supply’s screw was put in such a spot that one would need an L-shaped screwdriver of some sort, while the CD-ROM’s hidden screw requires the abilities of Plastic Man.

In other words, I was trying to unscrew screws that couldn’t be unscrewed. What commenter Seele pointed out to me was I needed to start in the front of the PowerMac G4 by taking off the plastic drive covers.

A quick Google search brought me to this classic Quicktime video from Apple about how to get it done. Watching that, I couldn’t believe my own foolishness. Why hadn’t I just did some research before plowing into this project?

More… »

Project: the iMac G3 / iBook G3 RAM swap

November 16th, 2008

The G3s.

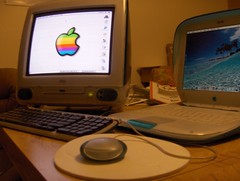
I try to practice what I preach, so when my grandma’s old Packard Bell computer exploded, I bought a used blueberry iMac G3 to fix up and upgrade for her to use.

The iMac bears the scars of its duration in the public school system, but it still chugs along. I bought a 256 MB SO-DIMM RAM chip for it, thinking it would help pull a new Panther install along on the 333 MHz machine, but I think grandma’s model was one of the iMacs that will only recognize some of the RAM it’s given. Given that, it seems 256 MB of RAM would be better used in my iBook G3 333Mhz blueberry clamshell.

But first, I needed to swap that RAM chip (a PC133 model) with a 256 MB chip inside my Bondi Blue iMac G3 (a PC100 model). More… »

Project PowerMac: USB 2.0 PCI card installed on Yikes! G4

August 13th, 2008

IMG_1142.JPG

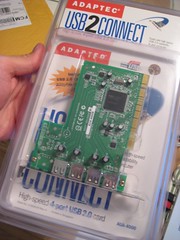
Two days and about $15 later, my “Yikes!” PowerMac G4 now features full USB 2.0 capabilities thanks to the PCI card I installed on Thursday.

More… »

Sunday project: AirPort on a G3 iBook clamshell

March 2nd, 2008

The subject.

[NOTE: I forgot to add this, but I’m running OS X 10.2.8 – just in case the network stuff doesn’t look familiar.]

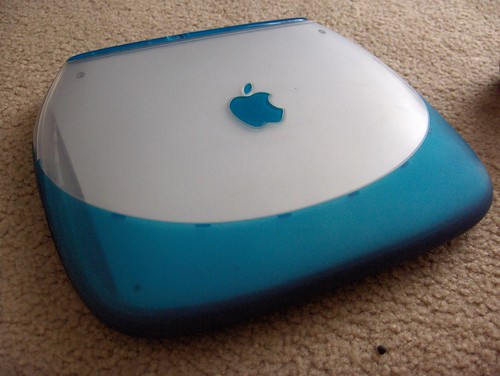
I love my G3 iBook. I bought it right before my Route 66 trip because (a) I was nervous about taking my then-new G4 and (b) the thing is built for road-warriors and students. It’s the toughest laptop I’ve ever seen, and I knew if I took it all the way across the country, it would survive in a pinch.

And it did, both on the Route trip and the Seattle trip. But one drawback was its lack of wireless connectivity. I underestimated the number of hotels – even run-down ones – that have wireless internet these days. One night, in Needles, California, I drove to three different hotels looking for an ethernet connection, never finding one (which is one reason why the Route updates didn’t come as often as I wanted).

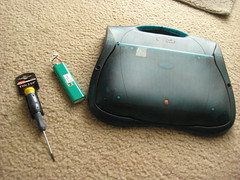
Now that’s all over with. I grabbed an AirPort card off eBay for a reasonable price, and took today to actually install the thing. More… »

Project: Make your own MacBook Paper, iPhone

February 6th, 2008

The paper duo.

That’s right: you can now make your own “world’s thinnest notebook” – a MacBook Paper.

See the apcommunity for video and complete instructions, including a print-yourself PDF to make your own MacBook Paper.  I did their version with some scrap paper, a pair of scissors, a glue stick, and a toothpick for the tricky parts.  Also, I went ahead and made my own iPhone Paper (print out courtesy of Gizmodo), aka iPaper.

Fun stuff, and a great stand-by project until (like me) you can save up for your own. It’s up to you, though, to attach pieces of string to make the iPaper fully functional.

I’m just excited about that MacBook Paper/envelope trick Steve Jobs demonstrated at Macworld 2008.