Backup isn’t backup, the saying goes, unless you automate it.
Backup experts also say you should keep a second, off-site copy of all of your important materials. If your house burns down, or zombies darken your door, that melted or masticated external hard drive isn’t going to be worth squat. Better to make a backup to a cloud-based system or a drive you keep away from your home.
A recent, goofy hard drive glitch got me thinking about both scenarios: the need to make an easy, automatic backup, and the need to archive it to some remote location. Since I don’t have OS X 10.5, with it’s compulsory Time Machine backup system, I needed to make my own backup strategy using the tools at hand on OS X Tiger.
So here’s how I used two OS X 10.4 applications, Automator with a dash of iCal, to develop a backup system that fits my needs.
First, an external hard drive is almost mandatory for any backup strategy. They’re handy, cheap, and easy to work with. I bought an affordable Seagate FreeAgent with 500 GB of storage, and partitioned it to three divisions: one for my iBook G4; another for my iMac G4 (OS X 10.4), PowerMac G4 (OS X 10.3) and iBook G3 (OS X 10.2); and the third for legacy stuff from my iMac G3 running OS 9.
Each was partitioned with plenty of space for each Mac, plus room for growth.
I made a clone of my iBook G4, my main Mac, on the first partition using Carbon Copy Cloner. Since the applications and preferences on my iBook don’t change that often, I set iCal to remind me every few weeks to make an incremental backup using CCC.
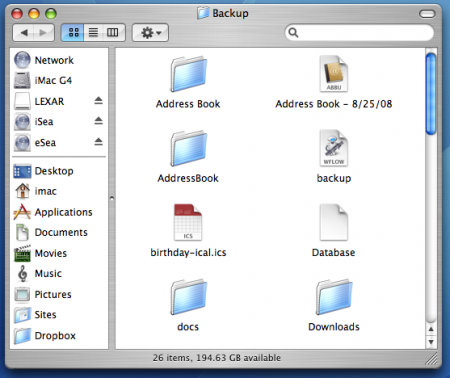
Then I set up a folder called “Backup” that will keep all the important files and folders that tend to change often. This would include my iTunes folder, my iPhoto library, and various projects.
Opening Automator was a new experience for me, but Apple makes it super easy to get started on a project like this. The trick, like a challenging game of Clue or Battleship, is knowing where to look. Most of this project involves moving files and folders with the Finder, so find the Finder actions first.
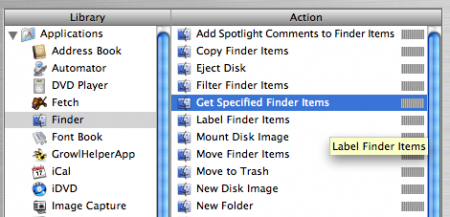
There’s a “Backup” folder to drop everything in, but we have to find stuff to shimmy to that dedicated folder. So, in Automator, find the “Get Specific Finder Items” (above) and select all the folders you want to have backed up.

In my case, I want all my Documents, my Projects, and my Music to be copied to the “Backup” folder. The cloning is done with Automator’s “Copy Finder Items” action, and I want all the copied files to overwrite what’s already there.
Now my important files will be backed up to a local drive. If my iBook crashes, and after I bury it in the backyard, I can simply copy these files to my new replacement Mac with no worries.
But what about an off-site backup?
For this part, I recommend either buying another external hard drive and keeping it safe at work or at a friend or relatives – or you can do what I’ve done and opt for an online solution. There are plenty out there to chose from (I hear good things about Amazon’s S3 service, for instance), but I stuck with a free and easy option – namely, Dropbox.
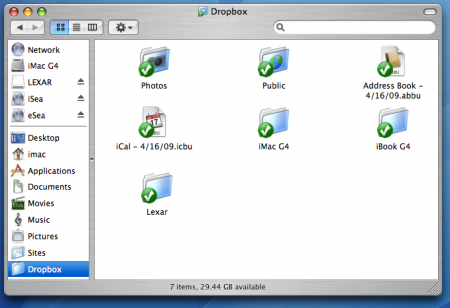
Dropbox is great because it acts just like a normal Finder folder. It takes a few minutes to sync large files from your Mac to the Dropbox server, but your files live in there just like they do on your Mac.
Plus your Dropbox folder acts like a network drive that’s accessible from anywhere, and on any operating system.
You get 2 GB for free, with the option to upgrade for more storage. The default 2 GB is fine for me, however, because I’m not backing up everything – just the essentials. For that, I simply tell Automator to grab a few Finder items and copy them to an appropriate Dropbox folder:
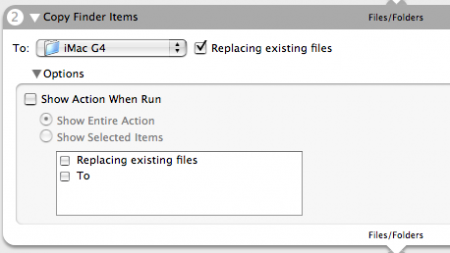
I have a folder for my iBook and a folder for my iMac (the iMac folder is above), plus another folder for my USB flash drive (or, as I like to call it, 128 KB of my life).
My Automator system is clunky, but it copies all the important files to two locations: the external hard drive at home and the Dropbox folder in the cloud.
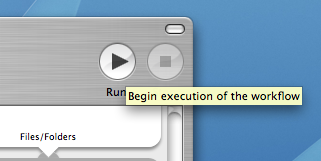
After you’ve created your Automator workflow, and you’ve tested it out (usually by hitting the Play button at the top right – see above), you can set the virtual machine to turn on automatically by saving the action list as an iCal appointment.
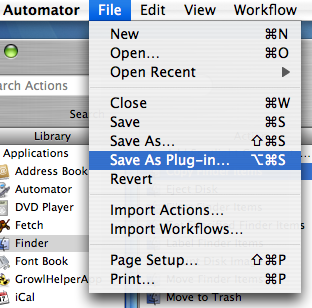
In Automator, head to File > Save as Plugin.
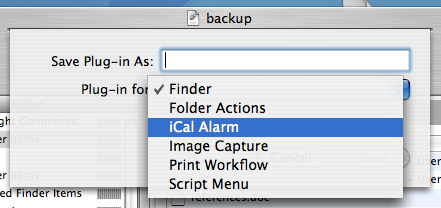
Since I want this automated, I’ll save my workflow as an iCal scheduled event. When you do, you’ll name it and iCal will open up, allowing you to place the backup script on the day and time you want.
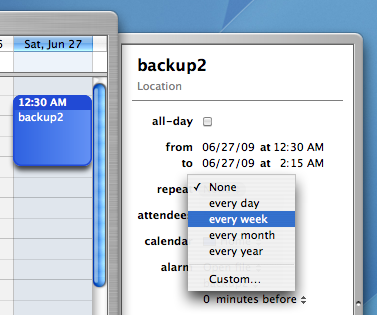
I set mine to backup automatically on Sunday afternoons, when I know my Mac is going to be awake and active, but not at a time when I’m doing a lot of work.
I’ll mention a warning: be sure to set your Automator/iCal workflow to run while your external drive is awake and ready. One day, I came back to a warning message on my iBook that my hard drive was completely full. When the Automator script recognized my external hard drive was in sleep mode, it created a fake external volume and backed up everything to that – squeezing everything it could into the remaining 20 GB or so left on my hard drive. Very messy.
An easy way to check whether your backup works is to view the contents, either on your external hard drive or cloud drive, in Finder’s list view:
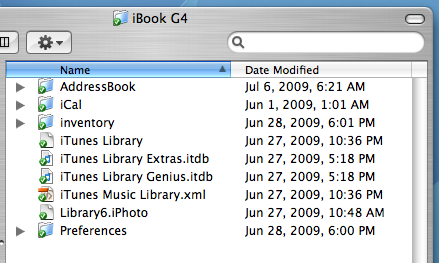
You can see that everything that was modified or changed updated recently, while files that hadn’t changed weren’t copied over. Sometimes computers act smart, and this is an instance that benefits you and your data.
You’ll know if it hasn’t worked when Automator freezes. This happens once in a while. I simply open up Automator and hit the Play button myself.
My Automator backup system isn’t elegant or pretty, but it works, and it keeps my data backed up even when I’m not thinking about it. From time to time, like mid-week, I’ll backup data manually just to be sure it’s safe and secure.
And hey, burning DVDs and CDs with archived data never hurts, either. I’m pretty paranoid about all my pictures disappearing, so I burned a few DVDs containing all my photos, plus some incremental backups when I think about it. Just to be safe.
But I don’t ever want to be caught with my Macintosh-brand pants down again. Either my data is safe somewhere else, or it might as well not exist. The more backup methods I can employ, the better I’ll feel.
Have a better system? Let me know in the comments.
Cool! how do I make it copy things?
Posted by Macultracoolguy on September 24th, 2009.
It’s automatic – just point Automator at the Finder items, have it “Copy Finder Items” as an action, and then select the folders/files you want copied.
Posted by davelawrence8 on September 24th, 2009.
[…] Using Automator to make scheduled backups […]
Posted by A Collection of 70+ Automator Actions, Workflows and Tuts for Designers and Bloggers on November 19th, 2009.
[…] Using Automator to make scheduled backups […]
Posted by Brads BlogA Collection of Automator Actions, Workflows and Tutorials on May 24th, 2012.
[…] Using Automator to make scheduled backups […]
Posted by Mac Automation Tutorials | iEnticement on February 18th, 2013.