If you’ve ever thought about digging in and upgrading your PowerMac G4 (Yikes! model), here’s a tip:
Think again.
After several successful projects involving simple upgrades like RAM and a PCI USB 2.0 card, a recent attempt at installing an Apple-made DVD-ROM drive was a complete disaster. Sadly, it’s because of the design of the PowerMac itself; when you open it up, it looks customizable, but actually trying to take the thing apart is a nightmare.
And it’s all the screws’ fault.
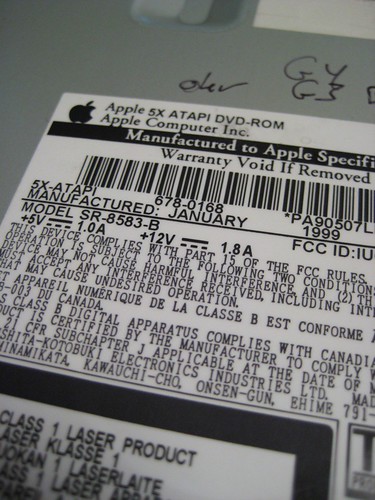
Here’s how it went down. I purchased a bargain DVD-ROM drive, circa 1999, off eBay (above). It’s in great condition, and it’s an Apple-branded model, which means it’ll work in anything Mac with an ATAPI connector. Looking at the interior of the PowerMac, you’d think upgrading would be a simple case of sliding out the CD-ROM drive, inserting the DVD-ROM drive, and plugging in a few wires.
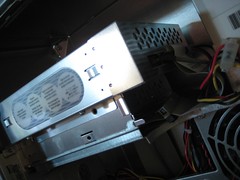
Early on, though, I found several obstacles – including ill-placed screws holding the CD-ROM drive (one placed behind the drive, facing the other side of the PowerMac, which is impossible to get to) and power supply in place. The power supply’s screw was put in such a spot that one would need an L-shaped screwdriver of some sort, while the CD-ROM’s hidden screw requires the abilities of Plastic Man.
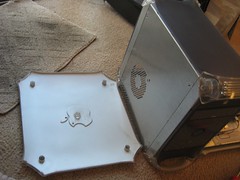
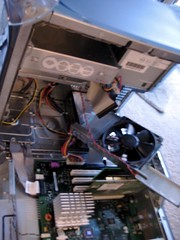
A lot of this I discovered after having already taken the beast apart. Using a screwdriver, I popped the side panel off the PowerMac, revealing nothing but a smooth wall of metal between me and redemption:
Abandon all hope, ye who enter here.
So reaching any screw or drive or bracket was impossible from this angle, too. The PowerMac anticipated my moves, and beat me at every turn.
After seeing a YouTube video where a fellow upgrader met similar challenges (warning: the kid can be annoying), I should have been better prepared. But that’s not the American spirit, is it? We expect to fix things by the sweat of our brow and the practicality of our tools. But little can we do against an enemy who meets our efforts with grim futility. The sad part is Apple makes it look so easy.
In the end, I gave up. The super computer had defeated me. All that was left was to try something drastic: hooking up the DVD-ROM drive without actually installing the thing.
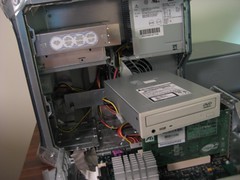
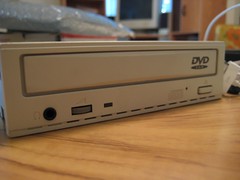
On that front, I was successful. Piecing the PowerMac back together, I used the power cord and ATAPI hookup and placed the DVD-ROM outside the PowerMac (above). And it worked. I was able to power up, load a DVD in the drive, and view its contents:

Who needed an actually installation? The DVD-ROM worked fine as long as nothing knocked it off its perch. In true FrankenMac fashion, I made the best of what I had.
The entire project was a means to load OS X 10.4 Tiger on the second, larger hard drive inside the PowerMac. And how did that turn out?
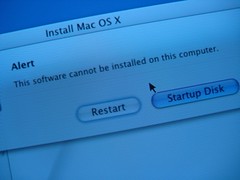
Just like the rest of the project: a damned failure.
I imagine it’s because I attempted the this-OS-goes-with-another-piece-of-hardware trick – namely, trying to install my iBook’s Tiger disc onto the G4. This, too, was a fruitless effort.
Now that I have my commercial copy of OS X Tiger, I can attempt a second install.
After the Prozac kicks in, that is.
I must have gotten lucky with my G4 and G3 when I upgraded the CD drives to DVD-RW’s. Mine after removing the wires and the plastic cover on the front of the machine, just pulled on out. I guess some machines must have been made slightly different in that regard. Either that or Yosemite and Sawtooth are made differently from Yikes.
Posted by VInce LoGreco on September 4th, 2008.
At least I don’t remember any screws, I will have to check out my machine when I get home to be certain.
Posted by VInce LoGreco on September 4th, 2008.
[…] I’m on the board for a local recycling non-profit, and twice a year we hold e-waste drives for the community. It’s where I get a lot of my second-hand project Macs. […]
Posted by Solving the e-waste dilemma with One Used Mac Per Child. « Newton Poetry on November 11th, 2008.
Very odd that; I thought it is obvious that the front drive carriage comes out from the front; perhaps I got used to it but it takes me less than one minute to take it out.
This page refers to the Blue-and-White G4 but the graphite G4 would be identical in procedure:
http://www.sterpin.net/uk/gravbbuk.htm
Posted by Seele on November 13th, 2008.
It cold be I just wasn’t brave enough to pull the front off. But thanks to you, Seele, and Vince, I just might have to give it a try. Thanks!
Posted by davelawrence8 on November 13th, 2008.
[…] to install a DVD-ROM (the right way) Boy, do I feel like a goober. A commenter on my “DVD-ROM doom and gloom” post, Seele, pointed me to a how-to article on switching the optical drive in a blue and […]
Posted by Project PowerMac: how to install a DVD-ROM (the right way) « Newton Poetry on November 24th, 2008.