Boy, do I feel like a goober. A commenter on my “DVD-ROM doom and gloom” post, Seele, pointed me to a how-to article on switching the optical drive in a blue and white Power Macintosh G3. Here I had been having issues getting the drive tray out from the inside of my PowerMac G4; it turns out I was going about it all wrong.
My objective was to switch out the CD-ROM drive in the PowerMac with a DVD-ROM drive I picked up on eBay. Looking back at the original post, you can see where it all went wrong:
Early on, though, I found several obstacles – including ill-placed screws holding the CD-ROM drive (one placed behind the drive, facing the other side of the PowerMac, which is impossible to get to) and power supply in place. The power supply’s screw was put in such a spot that one would need an L-shaped screwdriver of some sort, while the CD-ROM’s hidden screw requires the abilities of Plastic Man.
In other words, I was trying to unscrew screws that couldn’t be unscrewed. What commenter Seele pointed out to me was I needed to start in the front of the PowerMac G4 by taking off the plastic drive covers.
A quick Google search brought me to this classic Quicktime video from Apple about how to get it done. Watching that, I couldn’t believe my own foolishness. Why hadn’t I just did some research before plowing into this project?
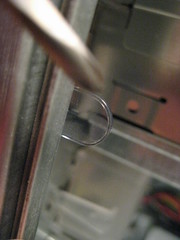
Here’s where the fun begins. These plastic tabs (above) anchor the plastic cover on the PowerMac. A little push on both of them takes the cover right off:
Easy as apple pie. Now the rest of this little project depends on two little screws in the front.
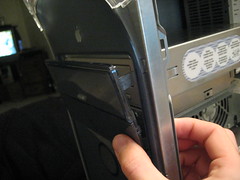
Two little screws hold the drive chassis in place.
Just give a little yank and the whole thing slides right out. You can either pull the connection cords off here, or earlier in the process. I started, foolishly, by yanking the cords in the beginning. Pulling them at this point in the process would have saved me a lot of grief. But what we’re learning is I’m no stranger to grief when it comes to taking apart PowerMacs, eh?
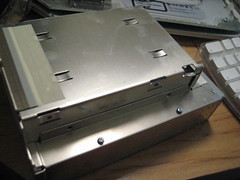
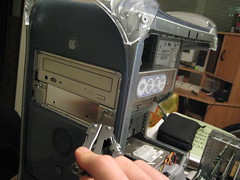
Those two screws in the bottom of the above picture? They’re the ones that made my life a living hell. Now, they’re laid bare – totally exposed to my whim and fancy, and they’re the only thing holding the CD-ROM drive in place.
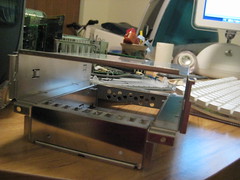
Unscrew the screws and the drive slides right out. Now you have an empty place (above) for your DVD-ROM drive. Slide it in, make sure the holes line up, and screw those pesky screws back in place.
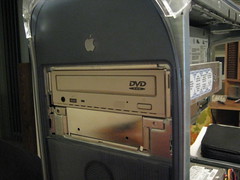
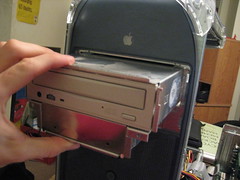
Once the DVD-ROM is securely in place, you can slide the drive chassis back into the PowerMac. I plugged all the cords back in when the drive was half-way in. Then put the two screws back that held the drive chassis in place, slip the plastic cover back on, and you’re in business: a PowerMac G4 with a DVD-ROM drive.
Wasn’t that easy?
Thanks, Seele, for pointing me in the right direction. I knew that the plastic cover came off the front of the PowerMac, and I figured there had to be an easier way to replace an optical drive. Apple’s how-to video gave my brain enough of a jump start for it all to come together – and to make me feel like a real idiot.
But now it’s done. You can check out the rest of my Project PowerMac series as I first bring it home, plug in some fresh RAM, and install a USB 2.0 PCI card.
[…] with Mac Minis, but a Cube seems even more flexible for creative mash-ups.After messing around with my PowerMac G4, I’m starting to get into these Mac mods. It’s one of those fun weekend project kind of […]
Posted by Photo Tour: Mac Plus G4. « Newton Poetry on December 18th, 2008.
I saw your article on the wrong way to install a DVD Rom into your G4,and I need to do the same thing with my G4 for the same reason you said you need to install a DVD in yours. My question is, after all of your installation of the unit, were you ever able to install your OS X Tiger 10.4 DVD using your new DVD Rom Drive?
Thanks,
Andy
Posted by Andy on January 25th, 2009.
Actually, Andy, I decided to keep Panther on the G4. Mostly, I like the idea of having several OSes running on different Macs – Jaguar on my G3 iBook, Panther on the PowerMac, Tiger on everything else – just so I can get the flavor of each one.
Posted by davelawrence8 on January 26th, 2009.