The Newton eMate 300 is a great machine. Small, portable, rugged – a sort of proto-netbook that lets you type on the go. And the battery life is great if you have a working, rechargeable battery with plenty of juice.
When my eMate came, I found out right away that the battery pack was probably the original. It held a charge for about three minutes. So while it’s handy to pop a few fresh AA batteries into a MessagePad and be back up and running, the eMate relies on its single battery pack. If it goes, you’re stuck with replacing it, building a new one from scratch, or keeping your eMate plugged in at all times.
I opted for the simplest solution: buy a new battery pack on eBay and installing it myself.
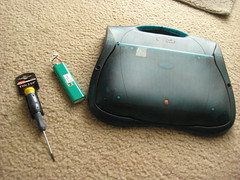
To start, I grabbed a new eMate battery pack from PowerBook Guy, a Torx wrench (I actually took my eMate into the hardware store to get the perfect-sized wrench), my eMate, and some starting instructions from Frank.
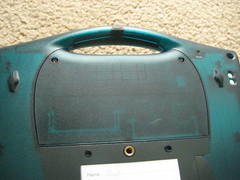
The first step is to flip your eMate over. See that half-circle hatch near the handle (above)? That’s what you’re taking off.
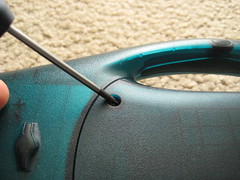
There are just two screws to remove on the cover, and they’re both at the top.
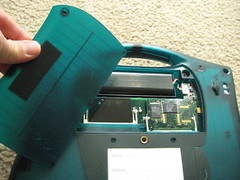
I left the screws in their slots as I lifted the cover off so I wouldn’t lose them. Now you see the good stuff: a few memory slots and the battery.
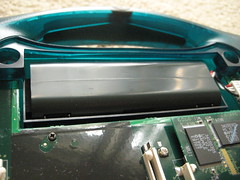
The battery pack isn’t bolted to the eMate; it simply rests in a little trench, with a wire attached to the circuit board.
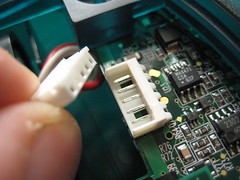
This is the most delicate of the steps: pulling the battery connection cable away from the circuit board. Be careful, and use something (I used my fingernail) to wedge the connector away from the plug-in.
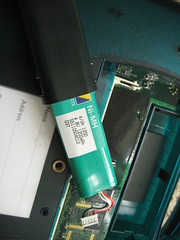
From here, pull the battery pack out of the eMate. The actually battery pack fits snugly inside the holster, but slides right out.
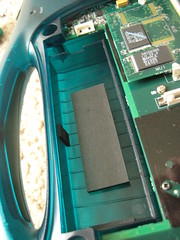
Here’s what the empty battery tray looks like inside the eMate. The soft pads keep the battery pack case from sliding around inside the Newton.

Slide your new battery back inside the protective casing, with the connection wire sticking out of the right-hand side.
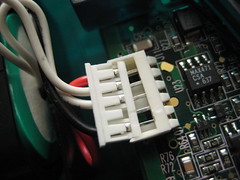
Now carefully slide the connection wire into the circuit board until it snaps tight. A little push on the white part will be plenty.
Place the battery case inside the eMate, replace the cover, and tighten your screws. That’s all.
I plugged my eMate in and let it charge a whole day, and now it’s like I have a whole new eMate. A fully-charged battery pack should last you for days, even with heavy usage.
The battery pack cost me about $20 (plus shipping) on eBay. There are some DIY die-hards who are all about making their own battery pack, but the soldering made me nervous. Maybe someday I’ll give it a try. This solution, however, worked fine for me.
Now my eMate is truly portable because I don’t have to worry about keeping it plugged in at all times. Replacing the battery pack was a cinch, too, and took all of about five minutes.


